How to Size Solar for Your RV
Choosing the right solar power system for your RV can feel like a daunting task. With so many options available, it’s easy to feel overwhelmed when deciding how much solar you truly need.
To adequately size a solar system for your RV you’ll need to estimate or calculate your power usage, factor in where, when, and how you’ll camp, and how your battery size plays into the system. But if you’re too lazy or just want a rough estimate size of the solar system you should consider – take a look at the quick and dirty RV solar sizing chart below or dive deeper with our RV Solar Sizing, Three Ways to Estimate Electrical Usage
Quick RV Solar Sizing Chart
RV Solar System Recommendations (Quick and Dirty)
We’ve worked with solar for many years. It’s hard to figure out all the calculations if you’ve never been RVing. So we’ve put together this quick RV solar sizing chart to give you an idea of what to expect. It’s good to remember that solar can grow with your usage. As you get more comfortable you’ll likely want to use more devices, so you’ll need more solar.
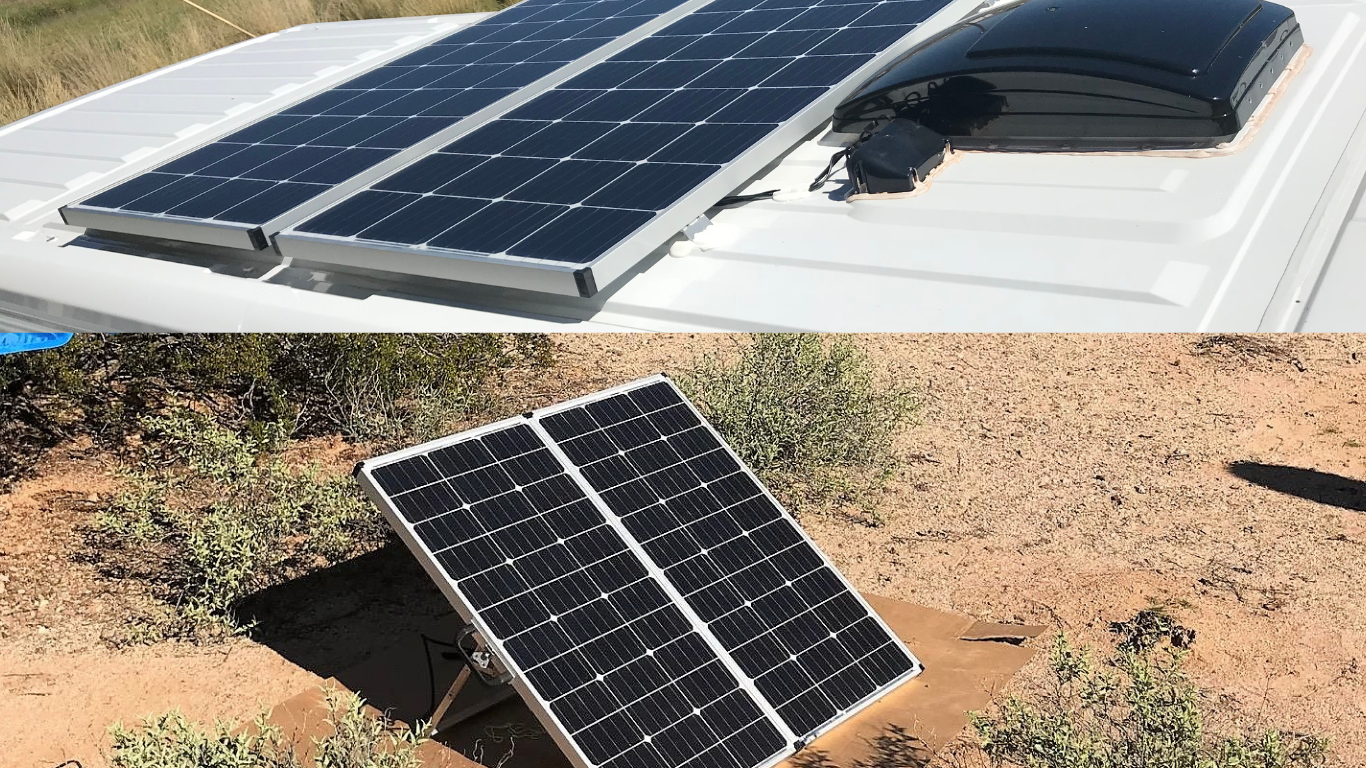
A portable solar system is a good option for light users who don’t want to modify their roof or RV. A rooftop mount solar system is good for those who don’t want to lug around a portable system, and who might need more power.
- RV Size: Small (14′ or less)
Battery Size: 1 – 12-Volt
Recommended Wattage: 100 Watts – Portable or Rooftop Mounted.
Notes: Starting with around 100 watts is a good spot to be. You can add additional portable systems or get a 100-watt system that can be easily expanded in the future. As you get comfortable using power you’ll always want more. - RV Size: Medium (15′ – 20′)
Battery Size: 2 – 12-Volt
Recommended Wattage: 160 Watt Portable or 150-Watt Rooftop Mounted.
Notes: Start with around 150 watts. Portable systems can be moved to get the best sunlight. Roof mounted system my need more power depending on your location. I generally always recommend being ready to expand if you’re in an RV. - RV Size: Large (21′ – 30′)
Battery Size: 2 to 3 – 12-Volt
Recommended Wattage: 200-300 Watts
Notes: I would likely jump to 300 watts and make your system expandable. Buying a larger kit is generally less expensive as compared to adding solar in the future. Plus if you have a 3 battery system and boondock you’ll need the solar wattage for the draw on larger rigs. - RV Size: Larger (31′ – 40′)
Battery Size: 4-6 – 12-Volt
Recommended Wattage: Larger Complex Systems
Notes: Large RVs aren’t designed to go off-grid for long periods. Most of these RVs have devices that draw a considerable amount of power. There is no quick and dirty size chart for larger RVs or large battery banks. You should learn all you can about how to properly size the a solar system.
Sizing Your System Based on Battery Capacity
When considering how to size a solar system for your RV, one approach is to look at your battery capacity. While this method can provide a rough estimate of your solar needs, it’s important to note that it is not the most common or reliable way to size a solar system. A comprehensive analysis of your power usage, camping habits, and environmental factors is essential for optimal performance.
Bonus if you can spot what’s wrong here!
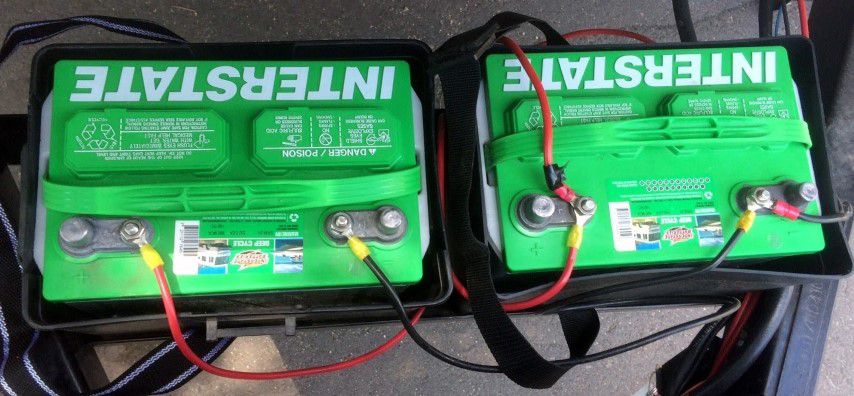
To size your solar system based on battery size, start by determining the total amp-hour (Ah) capacity of your battery bank. For example, if you have two 12-volt batteries wired in parallel, rated at 100 Ah each, your total capacity is 200 Ah. This figure represents the amount of energy you can draw from your batteries before needing to recharge them.
Keep in mind that if you are using lithium you can use the full capacity of the batteries. When using lead-acid battery type you should shoot for 50% of less of your capacity. So our 200 Ah battery above we should really think of as a 100 Ah battery bank. Learn more about RV Battery Types.
A general guideline is to aim for a solar panel output that can replenish your battery bank within a day, especially if you plan to camp off-grid. A common rule of thumb is to have at least 100 watts of solar power for every 100 amp-hours of battery capacity. Using the previous example, a 200 Ah battery bank would ideally require at least 200 watts of solar power to ensure efficient charging.
However, this method has its limitations. It does not account for your actual power consumption, which can vary significantly based on the appliances you use, the duration of their use, and the environmental conditions where you camp.
Warning: Relying solely on battery size to determine your solar system needs can lead to underperformance and insufficient power supply.
The Best Way to Size Your RV Solar System
To determine the ideal size of your RV solar system, you need to consider three key factors:
- How much power do you use?
- Where do you plan to do most of your camping?
- What time of year do you camp most frequently?
Daily RV Power Consumption
Understanding your daily power consumption is crucial for sizing your solar system and battery bank. Here are a few methods to estimate your average daily energy usage:
Measure Battery Voltage
One effective way to estimate your daily power usage is by measuring the voltage of your battery after a day of camping. This method can provide insight into how much energy you’ve consumed and how much capacity remains in your battery bank.
Step 1: Measure the Voltage
Begin with a fully charged battery. After a day of camping, use a multimeter to measure the voltage of the battery. It’s important to take this measurement when the battery is not under load (i.e., when it’s not powering any devices) for the most accurate reading.
Step 2: Determine State of Charge (SoC)
Battery voltage correlates with the state of charge (SoC) of the battery. Here’s a general guideline for interpreting battery voltage readings for a 12-volt lead-acid battery:
- 12.6 – 12.8 V: 100% charged
- 12.4 V: 75% charged
- 12.2 V: 50% charged
- 12.0 V: 25% charged
- Below 12.0 V: Less than 25% charged
By measuring the voltage and comparing it to this scale, you can estimate the percentage of charge remaining in your battery.
Step 3: Calculate Amp-Hour (Ah) Usage
Next, you can estimate your amp-hour (Ah) usage based on your battery’s capacity and the percentage of charge used. For example, if you have a 100 Ah battery and you determine that the battery is at 50% charge after a day of camping, you can infer that you have used approximately 50 Ah of energy.
To calculate your usage more precisely, follow these steps:
- Find the Total Capacity: Know the total capacity of your battery bank (e.g., 100 Ah).
- Determine Percentage Used: If your battery is at 50% after a day of use, you’ve consumed about 50% of its capacity.
- Calculate Ah Used: Multiply the total capacity by the percentage used. In this case, 100 Ah x 50% = 50 Ah used.
This method not only helps you understand your energy consumption but also allows you to plan for future camping trips by ensuring your battery bank has enough capacity to support your needs. Regularly monitoring your battery voltage and usage will enable you to make informed decisions about your solar system size and battery bank capacity, ultimately leading to a more enjoyable and worry-free RV experience.
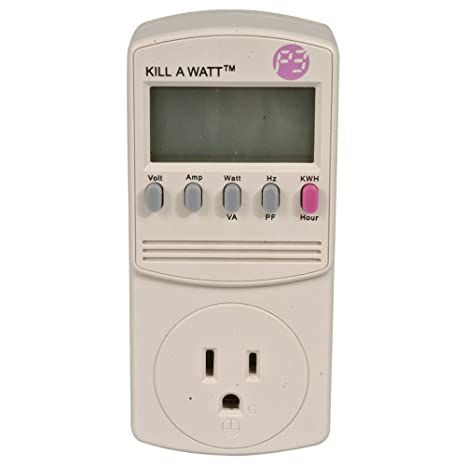
Use a Kill-a-Watt Meter
A Kill-A-Watt meter is a practical and cost-effective tool that helps you monitor your energy consumption in your RV. By plugging the meter into a standard outlet and then connecting your RV to it, you can track how many watts you’re using in real-time. This information is invaluable for understanding your energy usage patterns and making informed decisions about your solar system and battery needs.
How to Use a Kill-A-Watt Meter
- Plug It In: Insert the Kill-A-Watt meter into a standard electrical outlet in your RV.
- Connect Your RV: Next, plug your RV’s power cord into the Kill-A-Watt meter. This setup allows the meter to measure the energy flowing into your RV.
- Monitor Consumption: Once connected, the meter will display various readings, including the total wattage consumed, voltage, and cumulative energy usage in kilowatt-hours (kWh). You can monitor these readings while using various appliances to see how much energy each device consumes.
When to Use a Kill-A-Watt Meter
- During Shore Power Usage: The Kill-A-Watt meter is particularly useful when you are connected to shore power. It allows you to see how much energy your appliances are consuming in real-time, helping you identify which devices use the most power.
- To Track Energy Efficiency: If you’re trying to optimize your energy consumption, using the meter can help you determine which appliances are energy hogs. This information can guide you in making adjustments to reduce your overall power usage.
When Not to Use a Kill-A-Watt Meter
For High-Draw Appliances: While the Kill-A-Watt meter is great for most devices, it may not be suitable for appliances with very high wattage, such as air conditioners or large power tools. These devices can exceed the meter’s rated capacity, leading to inaccurate readings or potential damage to the meter.
When Off-Grid: The Kill-A-Watt meter is not effective when you are camping off-grid or using your battery bank, as it requires shore power to operate. In these situations, you’ll need alternative methods to estimate your energy consumption, such as monitoring battery voltage or calculating usage based on device specifications.
List Components and Usage for Calculation
List Components and Usage for Calculation
To accurately assess your potential RV electrical usage, it’s essential to take a detailed inventory of all the devices you plan to use. This process involves listing each device, estimating how long you will use it daily, and calculating the total energy consumption. Once you have this information, you can determine the appropriate solar system size to meet your daily energy needs. This method is the foundation of many solar calculators.
Step 1: Inventory Your Devices
Start by compiling a list of all the electrical devices in your RV. Below is a table of common 12-volt devices, along with their typical wattage ratings. This can serve as a helpful reference as you create your inventory.
| Device | Wattage (Approx.) | Daily Usage (Hours) | Daily Usage (Watt-hours) |
|---|---|---|---|
| LED Lights | 10-15 watts | 4 | 40-60 |
| Water Pump | 30-50 watts | 1 | 30-50 |
| Vent Fan | 10-15 watts | 8 | 80-120 |
| Refrigerator | 40-100 watts | 24 | 960-2400 |
| Laptop | 50 watts | 2 | 100 |
| Coffee Maker | 600-800 watts | 1 | 600-800 |
| TV | 30-100 watts | 3 | 90-300 |
| Phone Charger | 5-10 watts | 2 | 10-20 |
Step 2: Define Usage Duration
For each device, estimate how long you plan to use it each day. This will help you calculate the total watt-hour consumption for each device.
Step 3: Calculate Daily Usage
Multiply the wattage of each device by the number of hours you plan to use it to find the daily watt-hour consumption.
- Formula: Daily Usage (Watt-hours) = Wattage x Hours Used
For example, if you use LED lights (10 watts) for 4 hours, the calculation would be:
- LED Lights: 10 watts x 4 hours = 40 watt-hours
Step 4: Sum Your Total Daily Usage
Add up the watt-hour consumption for all devices to find your total daily energy usage. For instance:
- Total Daily Usage = Sum of all daily watt-hour usages
Step 5: Determine Solar System Requirements
Once you have your total daily watt-hour usage, you can look for solar systems that can generate that amount of energy each day. Keep in mind that solar panel output can vary based on factors like location, weather, and panel orientation. It’s advisable to account for inefficiencies and potential energy losses by adding an extra 20-30% to your total watt-hour requirement when sizing your solar system.
RV Camping Locations and Available Sun
If it’s not obvious, the amount of sun that is available will also factor in how much power you’re able to generate from solar panels. What might not be as obvious is that solar panels generate power even in cloudy conditions. You can read more about irradiance and how it’s factored in here – Solar Radiation Basics.
Camping in the American Southwest will be vastly different compared to camping in the American Northeast. The amount of sunlight that hits each area can vary based on terrain features and cloud coverage.
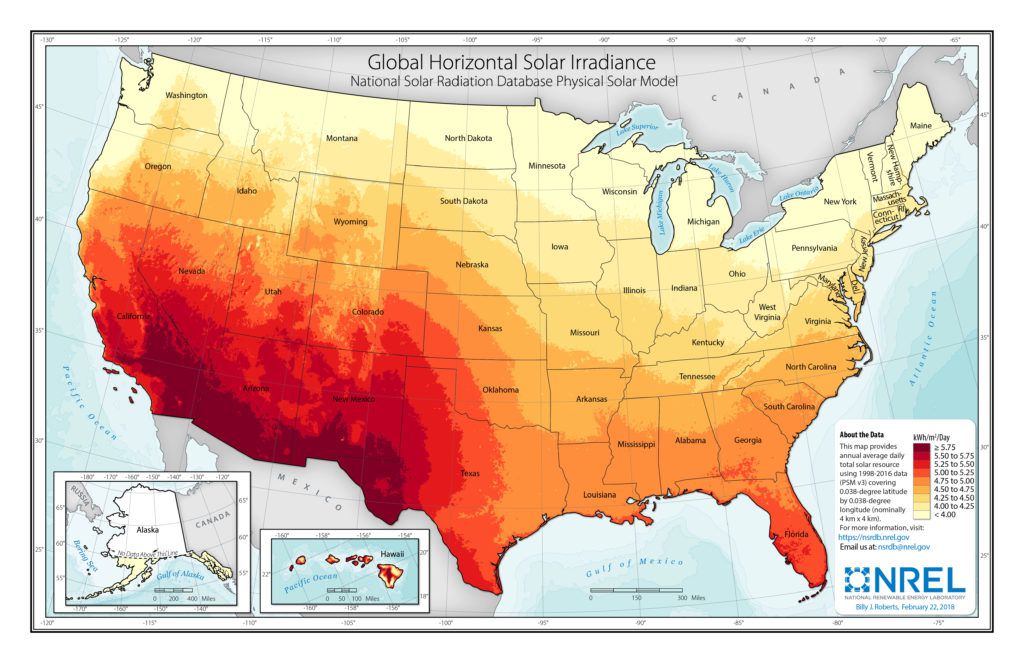
But also, don’t forget that terrain and weather play a factor in solar production. Maps like these can make you think that if you camp in the South you’ll have great solar power. While that can be true these areas can also have dense trees or large terrain features that can blog a good portion of the sun.
Average Solar Hours Per State
I took some sunshine data and put it in a table so you can get a sense of how many hours of sun hits your state on average.
But keep in mind this is an average for all year, and it’s for the entire state. It’s a good estimation if you like to camp in various spots. If you want more granular data I suggest you visit this site.
The Time of Year You Camp
The time of year you camp is also important. Most RVers camp during the summertime, maybe a little in spring and fall, but mainly in the summertime.
The quality of light changes with the seasons. Most winter in places is very cloudy, even in sunny spots like Bend, Oregon we see our fair days of clouds in the winter.
Winter times also come with shorter days. If you plan to do any camping in the “shoulder seasons” or winter time I would suggest you boost up your solar system by at least 30%. But it might be better to estimate how much solar you need by the amount of sunlight that will be available on the shortest and potentially cloudy days.
Here is a resource where you can do a bit more digging on how much sun is available in the US per month – https://www.nrel.gov/gis/solar-resource-maps.html